The Ultimate Molten Lava Cake Recipe: A Foolproof Chocolate Dream
Molten Lava Cake Recipe attempts used to fill me with a sense of genuine dread because I always assumed that a gooey, professional center was reserved for master pastry chefs with years of experience. I vividly recall the first time I made this for a special date, hovering over the oven like a bomb disposal technician, only to discover that the process is actually more about patience and timing than any kind of kitchen magic.
Thank you for reading this post, don't forget to subscribe!While some people prefer a quick easy chocolate lava mug cake for a late-night craving, there is something truly unparalleled about the sophisticated elegance of a perfectly baked ramekin. Here at Bake Mode, we focus on making high-end flavors accessible to every home cook, much like the classic techniques highlighted in this molten lava cake recipe that first inspired my own chocolate journey.
This dish has become my ultimate secret weapon for dinner parties because it is remarkably forgiving and can be prepared ahead of time to keep your evening stress-free. Once you learn to trust the simple visual cues of a set edge and a soft, slightly jiggling center, you will realize that creating this decadent river of chocolate is well within your reach.
The Science Behind This Molten Lava Cake Recipe
Understanding the physics of a molten lava cake recipe is the first step to guaranteed success. Unlike a traditional cake where we aim for a uniform crumb, here we are playing a dangerous and delicious game of brinkmanship. The goal is to cook the outer shell enough to support the structure while leaving the very center liquid. Many people think there is a separate truffle ball inserted in the middle, and while some recipes do that, the authentic bistro style relies purely on undercooking a rich, heavy batter. In the Bake Mode kitchen, we emphasize high heat for a short burst of time.
This rapidly sets the edges before the heat can penetrate the core. It is a thrilling balance that results in that signature textural contrast between the spongey exterior and the hot, liquid gold interior.
Selecting Chocolate for Your Molten Lava Cake Recipe
Your molten lava cake recipe will only ever be as good as the chocolate you choose to use. Since there are so few ingredients involved—mostly eggs, butter, and sugar—the flavor profile is entirely driven by the cocoa solids. I strongly recommend avoiding standard chocolate chips, which contain stabilizers meant to help them hold their shape. Instead, reach for a high-quality baking bar with at least 60% to 70% cocoa content. When we chop this chocolate and melt it down with the butter, we are creating the soul of the dessert.
I love using a mix of bittersweet and semi-sweet to get a depth of flavor that isn’t cloyingly sweet, especially since we often pair this with sweet garnishes like fresh raspberries or vanilla bean ice cream.
Prepping Ramekins for the Molten Lava Cake Recipe
The most heartbreaking failure in any molten lava cake recipe is when the cake refuses to release from its mold. You do not want to be digging your dessert out with a spoon while your guests wait. To ensure a clean release every single time, I use a two-step coating process. First, I brush softened butter upward along the inside of the ramekins—using upward strokes actually helps the batter climb the sides as it rises. Then, I dust them generously with cocoa powder or flour, tapping out the excess.
Using cocoa powder is my preferred method because it maintains that dark, intense visual appeal without leaving white flour streaks on your beautiful dark cake. This little bit of preparation is the insurance policy for that perfect plating moment.
The Wobble Test in This Molten Lava Cake Recipe
How do you know when your molten lava cake recipe is ready to pull from the oven? It all comes down to the wobble. This is the part where you have to trust your instincts over the timer. Ovens vary wildly, so while I suggest a baking time of 12 to 14 minutes, you need to watch the cake, not the clock. The edges should look firm and matte, pulling away slightly from the sides of the ramekin. However, the center size of a quarter should still look slightly wet and jiggle when you gently shake the pan.
If it wobbles like loose water, it needs another minute. If it doesn’t move at all, you have made a delicious cake, but the lava is gone. That slight jiggle is the sweet spot we chase.
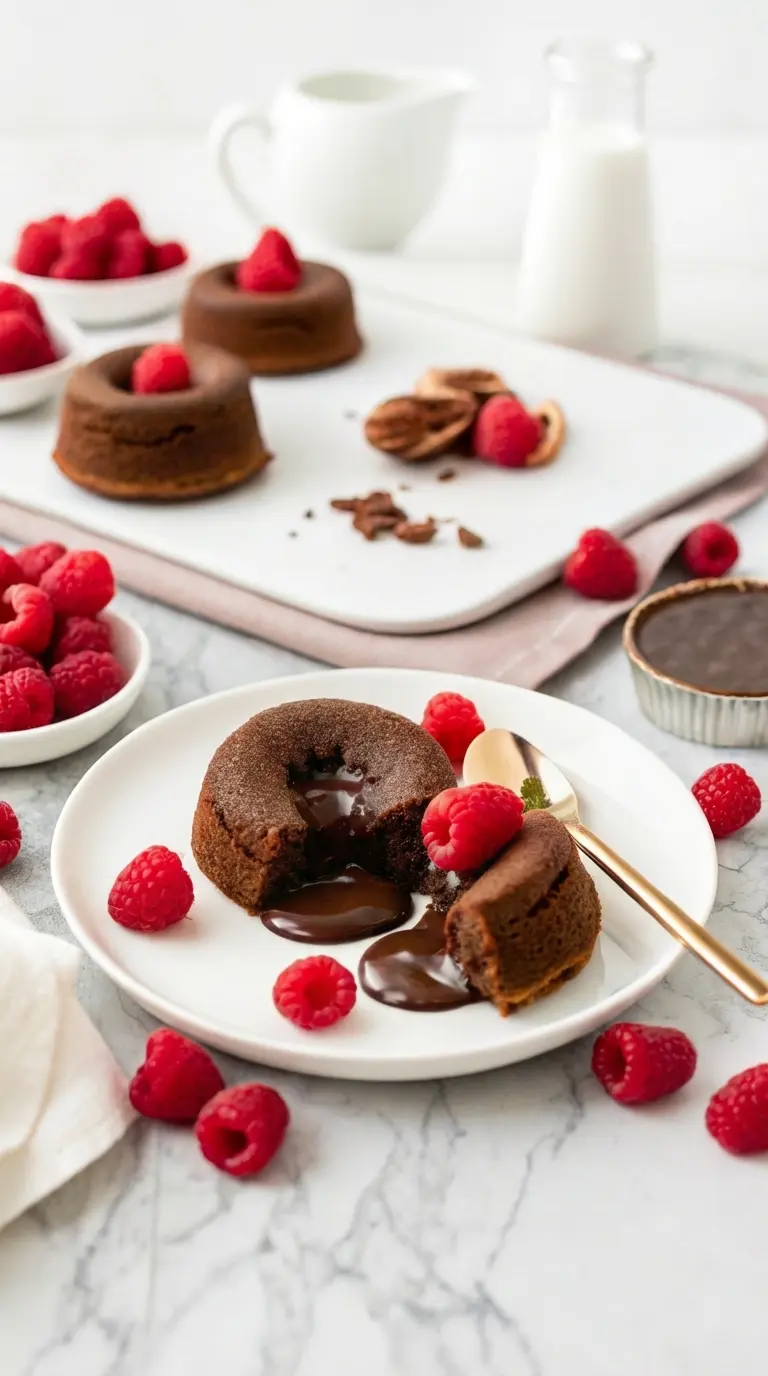
Plating and Serving Your Molten Lava Cake Recipe
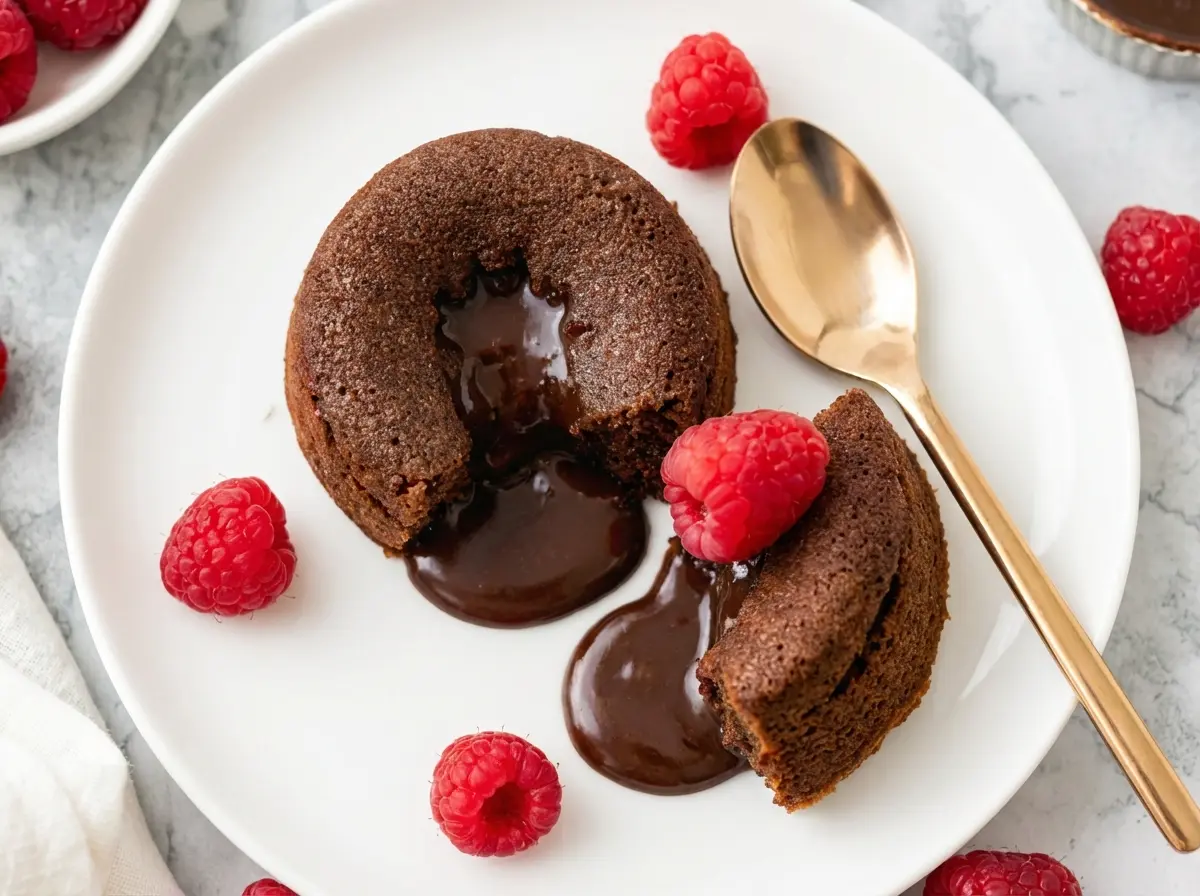
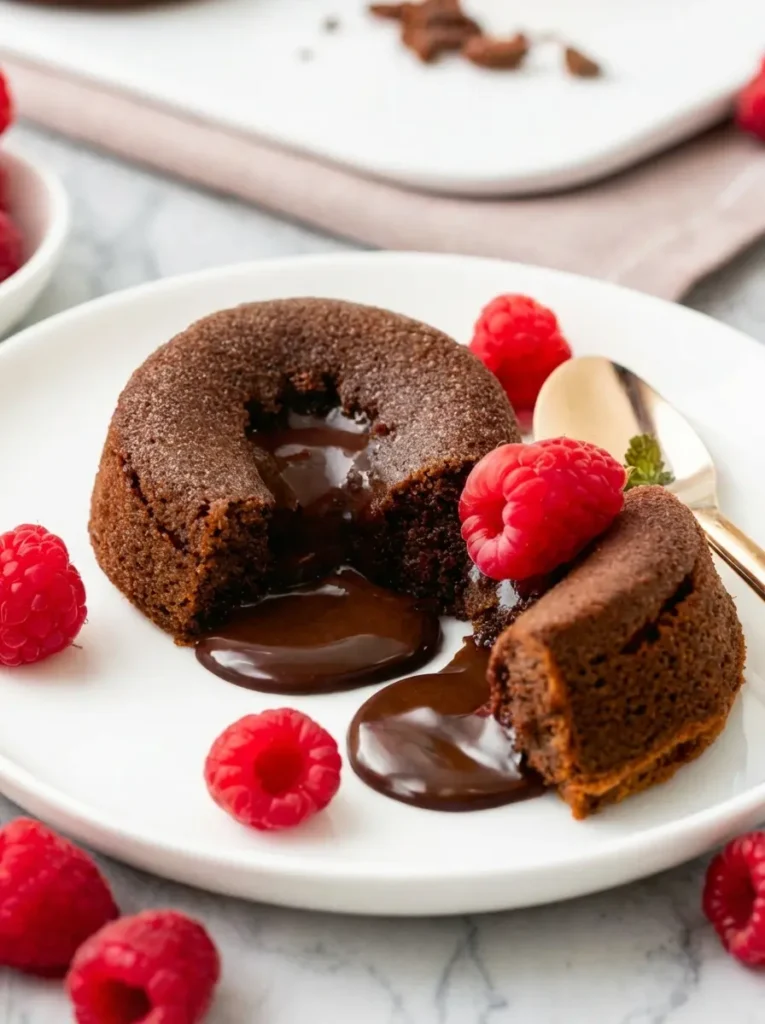
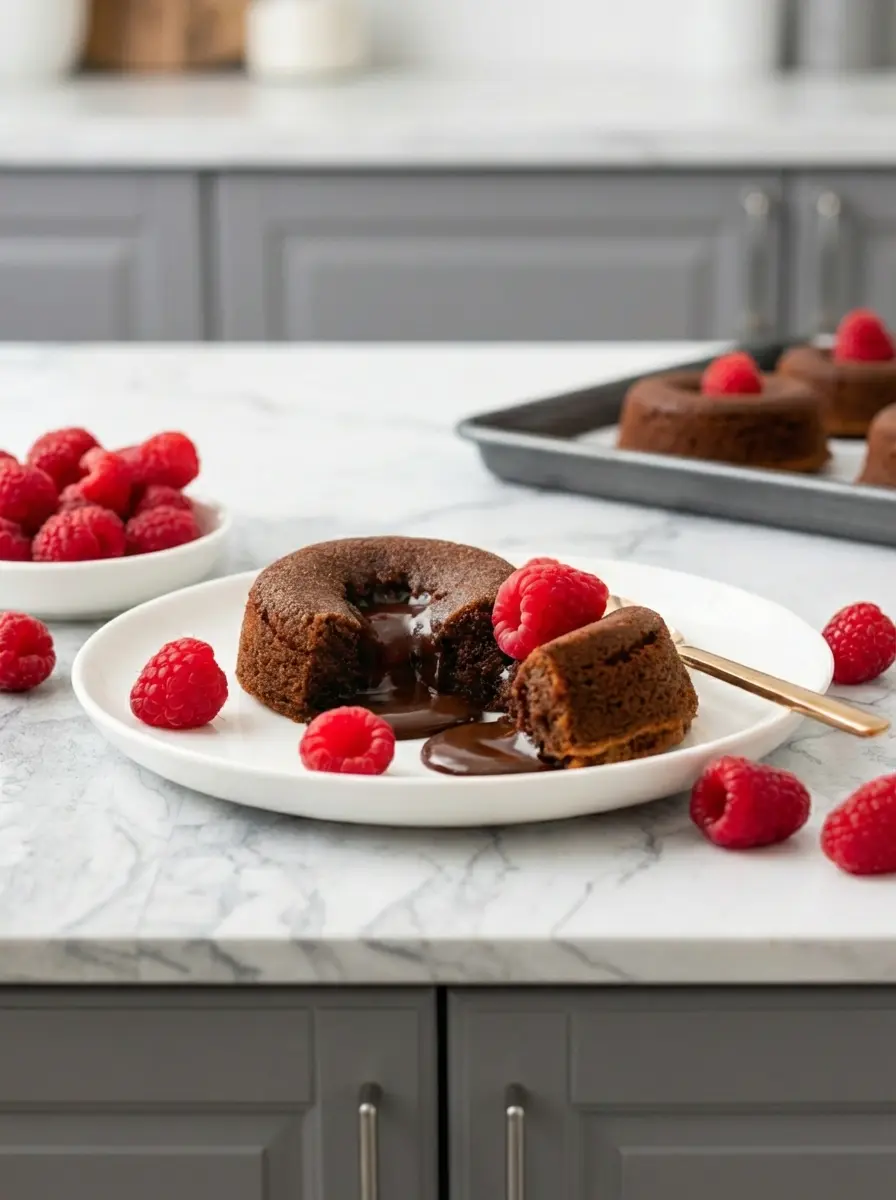
Now, let’s bring this memory to your kitchen with the final presentation. Plating is where this molten lava cake recipe transforms from a snack into an event. Once inverted onto a minimalist white plate, the dark chocolate contrasts beautifully against the ceramic. I always garnish with fresh raspberries; their tart acidity cuts through the richness of the chocolate perfectly. As seen in our kitchen adventures, a light dusting of powdered sugar adds a snowy elegance, and if you are feeling fancy, a gold spoon really elevates the experience. Serve immediately while it is hot. The contrast of hot chocolate lava against cold cream or fruit is exactly what makes this dessert a timeless classic.
The Ultimate Molten Lava Cake Recipe: A Foolproof Chocolate Dream
Course: DessertCuisine: FrenchDifficulty: 35/1004
servings30
minutes40
minutes300
kcalA decadent, restaurant-quality dessert made in your own kitchen. This Molten Lava Cake features a rich chocolate sponge exterior and a hot, flowing chocolate center, garnished with tart raspberries.
Ingredients
4 ounces (113g) semi-sweet baking chocolate, chopped
1/2 cup (113g) unsalted butter
1 cup (120g) powdered sugar
2 large eggs
2 large egg yolks
6 tablespoons (45g) all-purpose flour
1 teaspoon vanilla extract
Pinch of salt
Fresh raspberries (for garnish)
Cocoa powder (for dusting ramekins)
Directions
- Preheat your oven to 425°F (218°C). Generously butter four 6-ounce ramekins and dust them with cocoa powder, tapping out the excess.
- In a heatproof bowl set over simmering water (or in short bursts in the microwave), melt the butter and chopped chocolate together until smooth. Whisk gently to combine.
- In a separate large bowl, whisk the eggs, egg yolks, vanilla, and powdered sugar until the mixture is pale and slightly thickened.
- Fold the chocolate mixture into the egg mixture until well combined. Gently fold in the flour and salt until just incorporated. Do not overmix.
- Divide the batter evenly among the prepared ramekins. Place them on a baking sheet.
- Bake for 12-14 minutes, or until the sides are firm but the center still jiggles slightly.
- Let the cakes cool in the ramekins for 1 minute. Place a plate over the ramekin and carefully invert to release the cake.
- Serve immediately, topped with fresh raspberries.
Notes
- Use high-quality baking bars like Ghirardelli or Guittard, not chocolate chips.
- You can prepare the batter and fill ramekins up to 24 hours in advance; store in the fridge and add 1-2 minutes to bake time.
- If the cake doesn’t release immediately, run a small knife around the very top edge to break the seal.