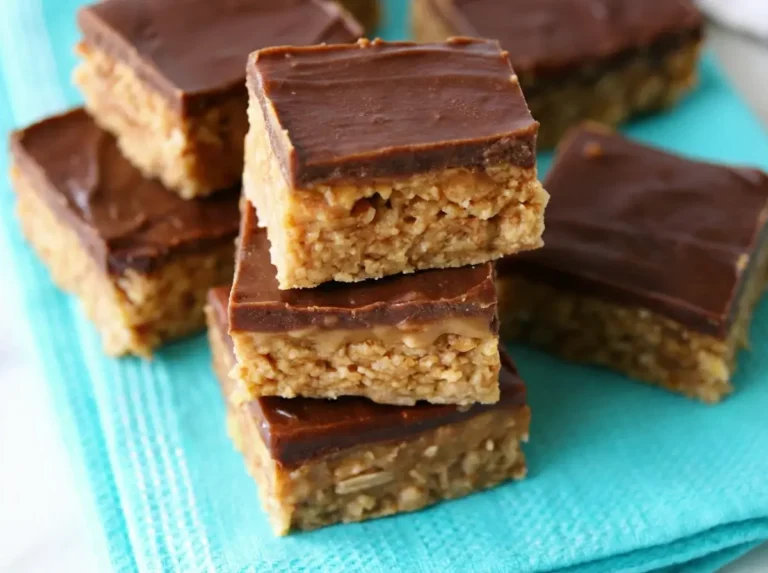
Chewy Homemade Granola Bars: Your No-Bake Go-To!

Chewy Homemade Granola Bars
There’s something truly magical about a snack that transcends its simple ingredients to become a comforting hug, a bite of pure, wholesome joy that instantly transports me back to my childhood kitchen. These Chewy Homemade Granola Bars are exactly that for me—more than just a grab-and-go treat, they’re a testament to how the simplest things can bring the most profound satisfaction, especially when life throws a curveball.
Thank you for reading this post, don't forget to subscribe!I remember those early attempts at achieving that perfect, chewy texture, navigating the crumbly mishaps of my non-baking days until I finally nailed it. That moment felt like a small, sweet victory, a true slice of kitchen bliss that made me want to share this joy with everyone. And now, I’m thrilled to share the secret to these incredible chewy no-bake granola bars with you, proving that minimal ingredients and even less fuss can lead to something truly extraordinary.
This recipe, with its mere five ingredients and no oven required, has become an absolute staple in my home. Perfect for those bustling mornings when you need a quick, satisfying breakfast, or an afternoon pick-me-up that actually holds you over, these bars are a wholesome delight. If you’re like me and can’t get enough of these delightful bites, you might also love exploring more inspiration on chewy homemade granola bars from fellow enthusiasts!
Chewy Homemade Granola Bars: Your No-Bake Go-To!
Course: DessertsCuisine: AmericanDifficulty: Easy4
servings30
minutes40
minutes300
kcalThese 5-ingredient Chewy Homemade Granola Bars are a no-bake wonder, packed with oats, chocolate chips, and dried fruit for a perfectly satisfying snack or quick breakfast. Easy, healthy, and incredibly delicious!
Ingredients
2 cups rolled oats (not instant)
1/2 cup creamy nut butter (peanut butter or almond butter work great)
1/3 cup honey or maple syrup
1/2 cup mini chocolate chips
1/2 cup mixed add-ins (e.g., chopped almonds, dried cranberries)
1/2 teaspoon vanilla extract (optional, for extra flavor)
Pinch of salt (optional, to enhance flavors)
Directions
- Line an 8×8 inch baking pan with parchment paper, leaving an overhang on the sides for easy removal. Set aside.
- In a large microwave-safe bowl, combine the nut butter and honey (or maple syrup). Microwave on high for 30-60 seconds, or until the mixture is warm and easily stirrable.
- Add the rolled oats, chocolate chips, mixed add-ins (like almonds and cranberries), vanilla extract (if using), and salt (if using) to the warm nut butter mixture.
- Stir thoroughly with a sturdy spatula until all the oats and add-ins are evenly coated and combined. It will be a thick mixture.
- Transfer the mixture to the prepared baking pan. Using the back of the spatula or your hands (lightly dampened to prevent sticking), press the mixture down very firmly and evenly into the pan. This is crucial for bars that hold together!
- Place the pan in the refrigerator for at least 2-3 hours, or until the granola bar mixture is firm.
- Once firm, use the parchment paper overhang to lift the entire slab out of the pan. Place it on a cutting board.
- Cut into 8-12 bars, depending on desired size. Store the Chewy Homemade Granola Bars in an airtight container in the refrigerator for up to 1 week, or freeze for longer storage.
Notes
- Press it Firmly!: The absolute key to no-bake granola bars that don’t crumble is to press the mixture down *really* firmly into the pan. Use all your strength! You can even place another piece of parchment paper on top and use a heavy can or another pan to help compact it.
- Mix-In Magic: Don’t be afraid to experiment with your add-ins! While chocolate chips, almonds, and dried cranberries are classic, consider shredded coconut, different nuts, other dried fruits like apricots or raisins, or even a sprinkle of flax seeds for an extra health boost. Just keep the total quantity about the same.
- Storage Sweetness: For the best chewy texture and to keep these granola bars from getting too soft, always store them in an airtight container in the refrigerator. They’ll stay perfectly firm and delicious for up to a week, making them ideal for meal prep!