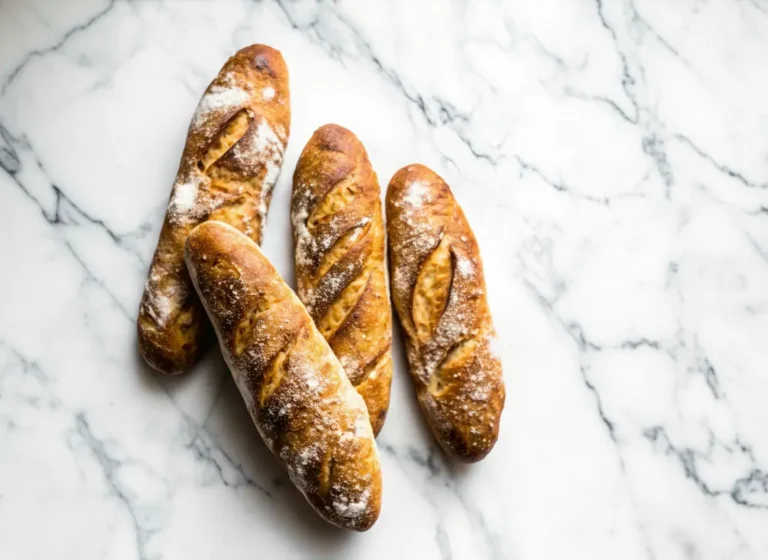
The Ultimate Homemade Fougasse French-Style Flatbread: Your Artisan Kitchen Adventure
The very words Homemade Fougasse French-Style Flatbread don’t just conjure images; for me, they instantly whisk me back to a tiny, enchanting boulangerie nestled on a cobbled street in Nice. The intoxicating aroma of freshly baked bread was a siren call, pulling me in with a warm, comforting embrace. I can still vividly recall holding that perfectly warm, leaf-shaped loaf, still steaming from the oven, a moment of pure, unadulterated joy that was more than just bread – it was a treasured experience, a memory I carried home.
Thank you for reading this post, don't forget to subscribe!That profound connection is precisely why I poured my heart into recreating that very magic in my own kitchen. It certainly took a few tries, navigating some delightful happy accidents (as Bake Mode likes to call them when things go deliciously off-script, much like exploring the nuances of a focaccia bread recipe guide). But oh, the immense satisfaction when that perfect, golden-crusted fougasse finally emerged from my oven, tasting exactly as I remembered!
This isn’t merely a recipe; it’s a heartfelt invitation to infuse your home with a piece of that vibrant Mediterranean charm, transforming simple ingredients into something truly extraordinary. Ready to bake your own slice of Provençal sunshine? Dive into my complete guide for Homemade Fougasse French-Style Flatbread and embark on your own delicious culinary adventure.
Unlocking the Secret to Tender Homemade Fougasse French-Style Flatbread Dough
The journey to a perfect Homemade Fougasse French-Style Flatbread starts with the dough. It’s a delicate balance of flour, water, yeast, and time. I’ve learned that patiently allowing the dough to proof in a warm, cozy spot is key. This is where Bake Mode truly shines, whispering encouragement as the yeast works its magic, creating those beautiful air pockets. Don’t rush it; good things come to those who wait, especially in the world of artisan bread. A slow rise develops a deeper flavor profile that supermarket bread simply cannot replicate.
Crafting the Iconic Leaf Shape for your Homemade Fougasse French-Style Flatbread
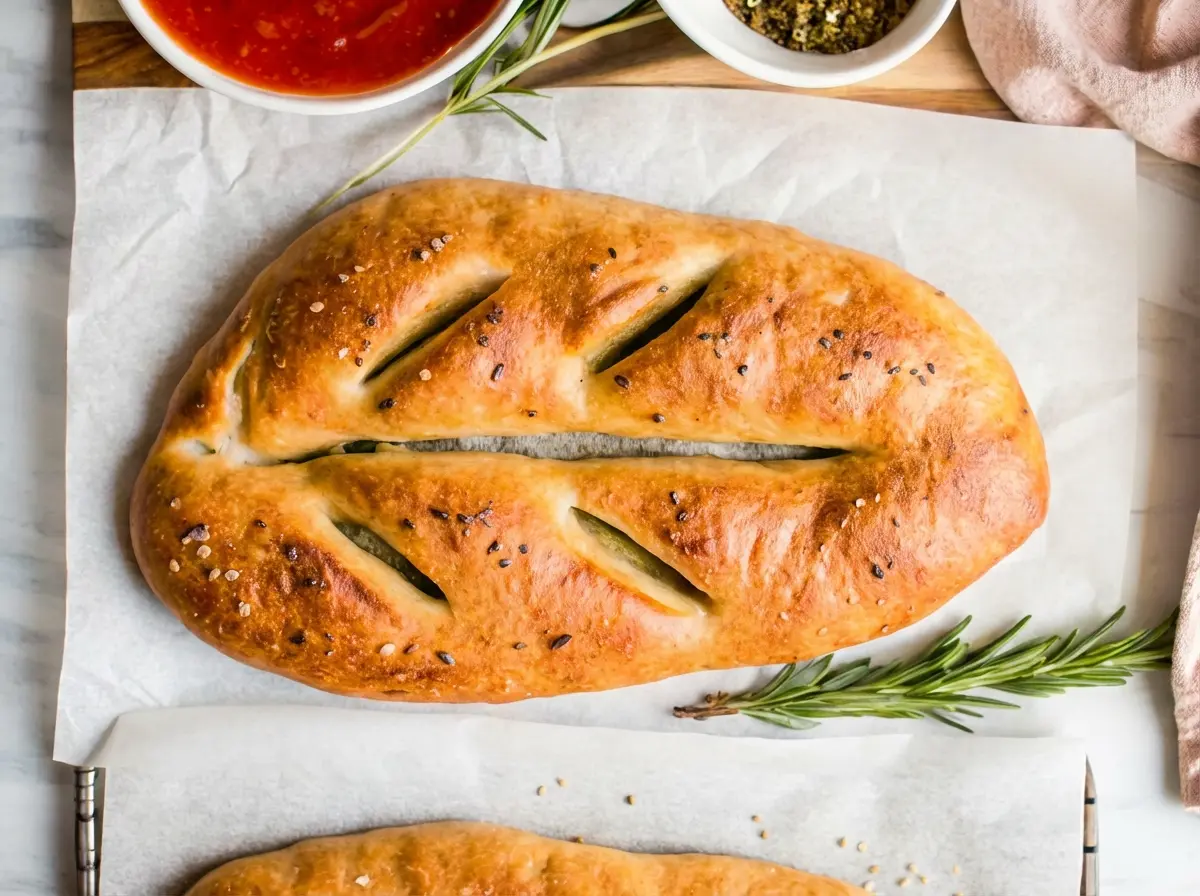
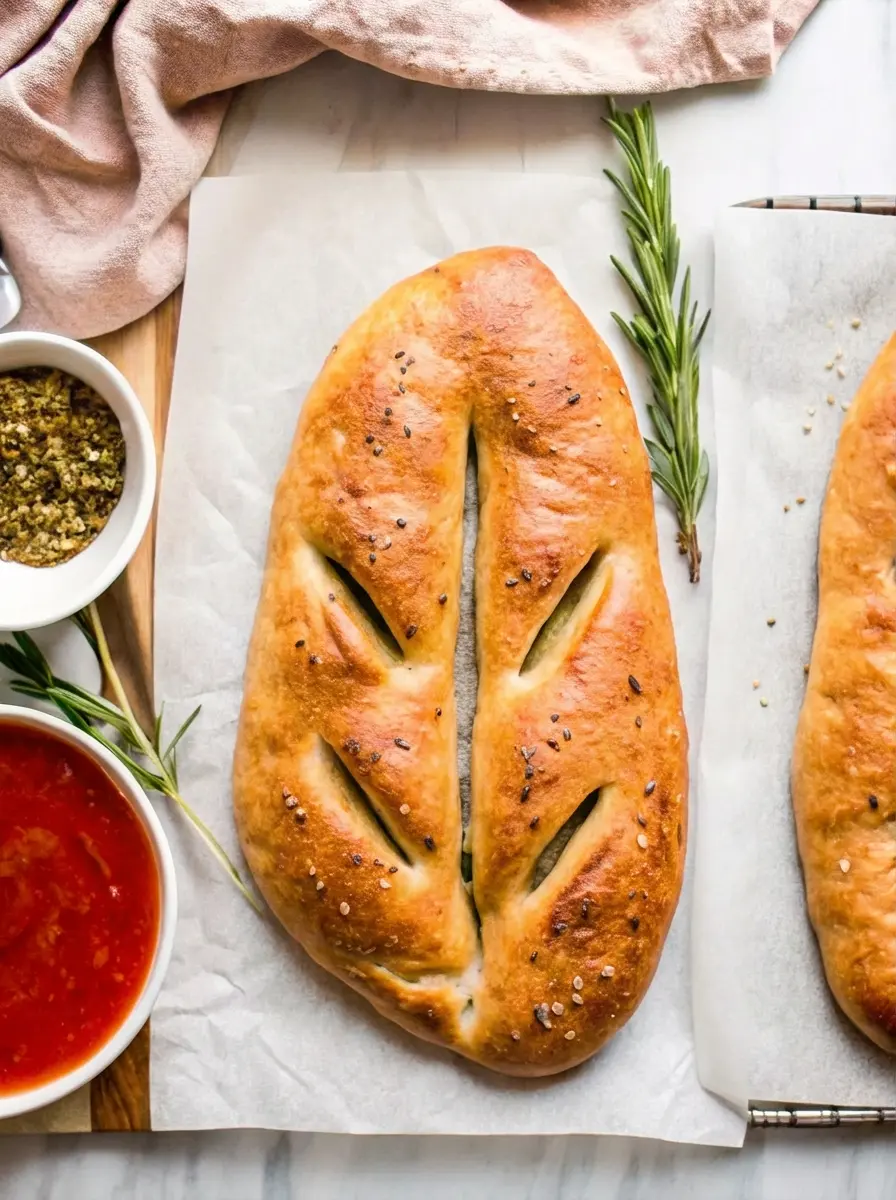
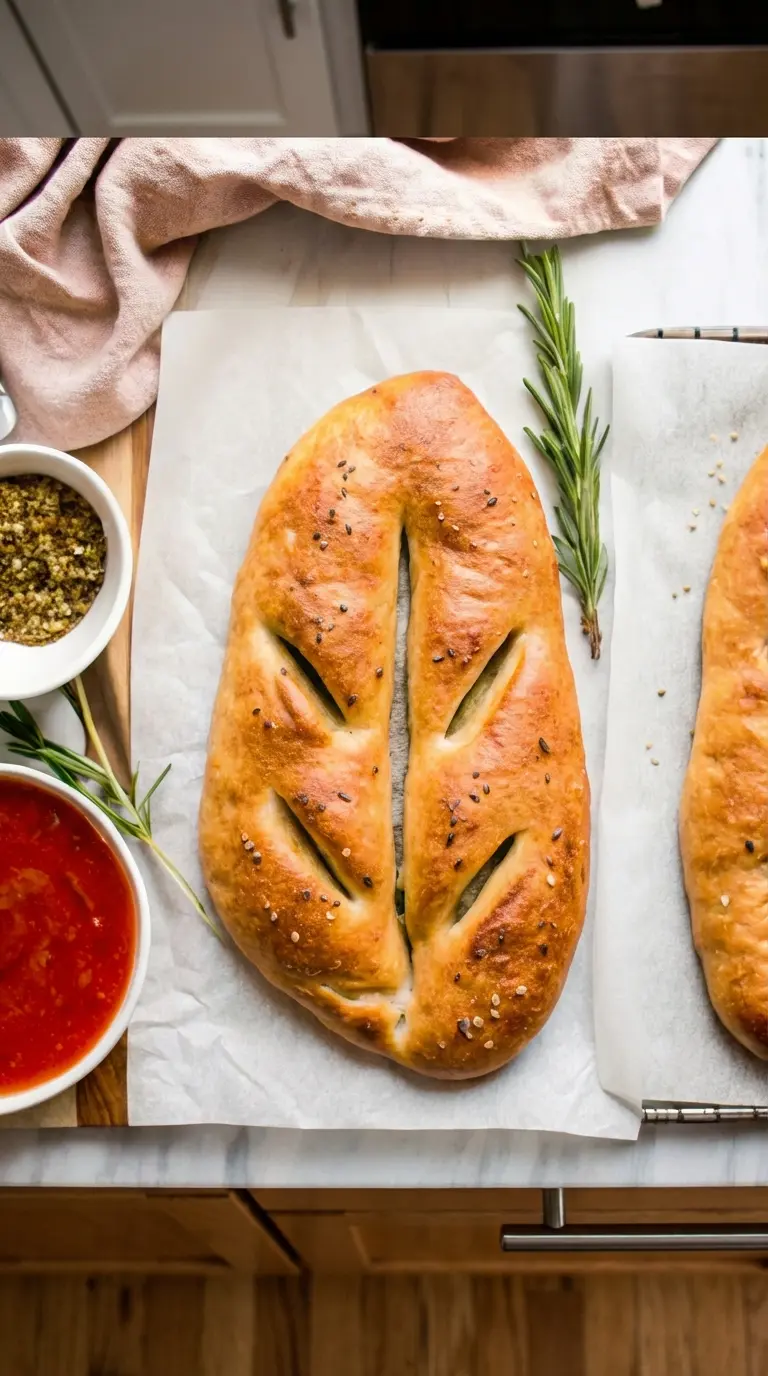
Shaping is where the fun really begins with Homemade Fougasse French-Style Flatbread. It’s incredibly forgiving, and there’s no right or wrong way to interpret the classic leaf design. I love pressing my fingers into the dough to create those distinct slashes, knowing each cut will bloom beautifully in the oven. Taste Charm always reminds me that these imperfections are what make homemade bread so unique and beautiful. A little olive oil before baking ensures that signature golden crispness.
The Art of Seasoning Your Homemade Fougasse French-Style Flatbread
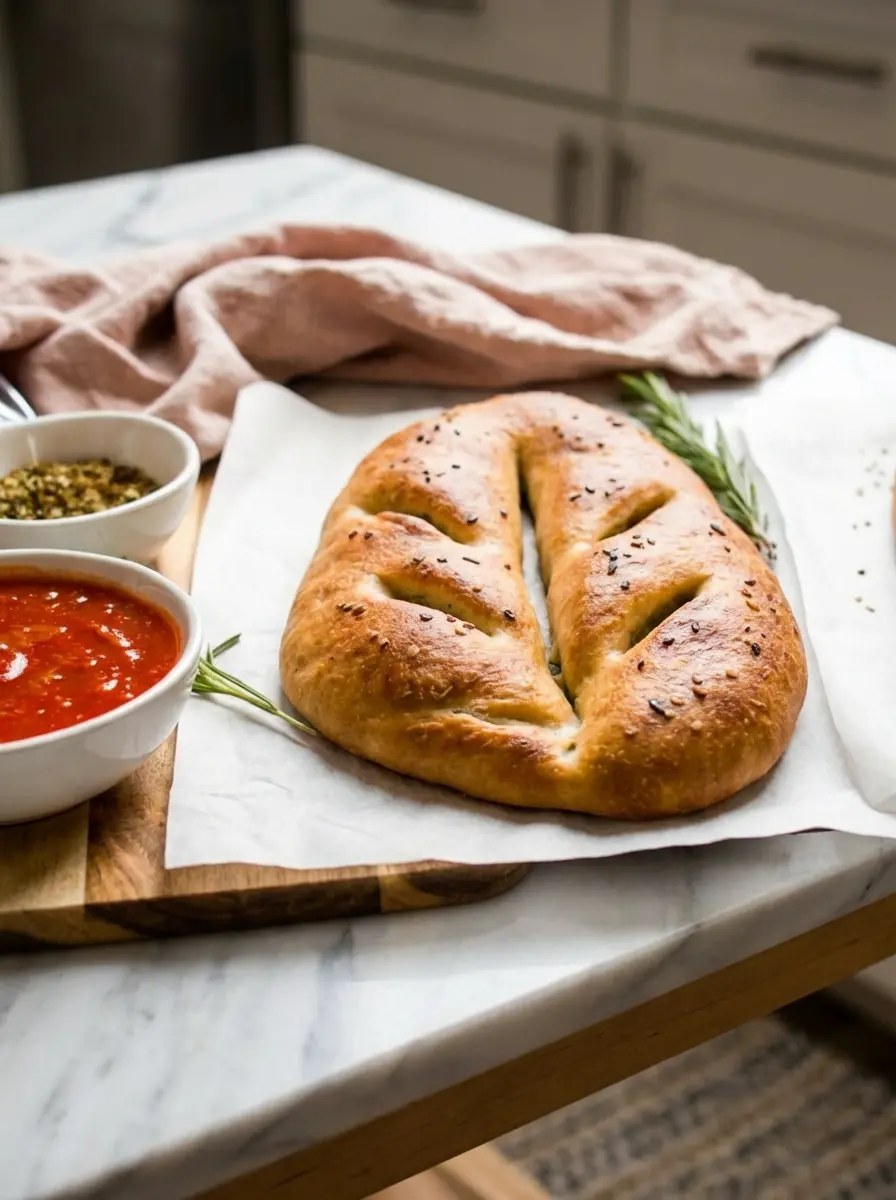
While traditional Homemade Fougasse French-Style Flatbread is simple, I love to elevate it with a sprinkle of sea salt and a touch of fresh rosemary, just like in my kitchen memory. You could also add olives or sun-dried tomatoes for an extra burst of Mediterranean flavor. The key is to press the seasonings gently into the dough before the final rise so they don’t fall off during baking. This thoughtful addition transforms a simple flatbread into a culinary masterpiece.
Achieving the Perfect Golden Crust on Homemade Fougasse French-Style Flatbread
The oven is where the magic truly happens, transforming soft dough into a crusty, aromatic Homemade Fougasse French-Style Flatbread. A hot oven is crucial for that initial burst of steam, leading to a beautiful golden-brown crust and a tender interior. I always keep an eye on it, rotating if necessary, to ensure even browning. That moment when you pull it out, golden and fragrant, is incredibly rewarding – a true celebration of your kitchen victory.
Serving Suggestions for Your Homemade Fougasse French-Style Flatbread
This versatile Homemade Fougasse French-Style Flatbread is perfect for dipping into olive oil and balsamic, accompanying a hearty stew, or serving alongside a fresh salad. I often make two – one for immediate enjoyment and another for sharing (if it lasts that long!). It’s wonderful warm, but still delicious at room temperature. Sharing this bread with loved ones around the table creates simple, beautiful moments, embodying the very essence of home cooking and hospitality. Now, let’s bring this memory to your kitchen…
The Ultimate Homemade Fougasse French-Style Flatbread: Your Artisan Kitchen Adventure
Course: BreadsCuisine: FrenchDifficulty: Medium4
servings30
minutes40
minutes300
kcalRustic French-style flatbread, golden and aromatic, perfect for dipping or alongside meals.
Ingredients
1 ½ cups warm water (105-115°F / 40-46°C)
2 ¼ teaspoons active dry yeast (one packet)
1 teaspoon granulated sugar
3 ½ cups all-purpose flour, plus more for dusting
1 ½ teaspoons fine sea salt
2 tablespoons olive oil, plus more for brushing
Flaky sea salt, for sprinkling
Fresh rosemary sprigs, for garnish (optional)
Directions
- In a large bowl, combine warm water, yeast, and sugar. Let stand for 5-10 minutes until foamy.
- Stir in flour and fine sea salt until a shaggy dough forms.
- Add 2 tablespoons of olive oil and knead on a lightly floured surface for 8-10 minutes until smooth and elastic.
- Place dough in a lightly oiled bowl, turning once to coat. Cover with plastic wrap and let rise in a warm place for 1-1.5 hours, or until doubled in size.
- Preheat oven to 425°F (220°C). Line a baking sheet with parchment paper.
- Gently punch down the dough. Divide into two equal portions.
- On a lightly floured surface, shape each portion into an oval or leaf shape, about 1/2 inch thick.
- Using your fingers or a sharp knife, make several deep slashes in the center of each loaf, pulling the dough apart slightly to emphasize the leaf shape.
- Transfer fougasse to the prepared baking sheet. Brush generously with olive oil and sprinkle with flaky sea salt and fresh rosemary (if using).
- Bake for 18-22 minutes, or until golden brown and cooked through.
- Let cool slightly on a wire rack before serving.
Notes
- For extra flavor, incorporate olives, sun-dried tomatoes, or garlic powder into the dough during kneading.
- Ensure your water isn’t too hot, or it will kill the yeast.
- Leftovers can be stored at room temperature in an airtight container for up to 2 days, or frozen for longer. Reheat gently in the oven for best results.