Best Four Layer Peanut Butter Brownie Bars Recipe
There is something truly magical about how these Four Layer Peanut Butter Brownie Bars can transform a completely ordinary rainy Tuesday into a celebrated occasion in our home. I still vividly remember the first time I attempted this recipe; the kitchen was filled with the intoxicating scent of melting chocolate and the rhythmic, comforting sound of the whisk hitting my favorite ceramic bowl.
Thank you for reading this post, don't forget to subscribe!While I often find myself craving the nostalgic crunch found in my butterfinger brownies recipe, there is a specific kind of patience and heart required to master the decadent, stacked layers of this particular treat. Over the years, this dessert has become a staple on our wooden cutting board, serving as the culmination of endless sessions spent tweaking the ratio of salt to sugar until the balance was absolutely perfect.
Slicing through that rich dark chocolate topping into the golden peanut butter center is a constant reminder of why I started this kitchen journey in the first place. Whether we are celebrating a housewarming or simply enjoying the way the morning light hits the marble counters, these bars represent the simple joy of sharing something truly indulgent with the people I love most.
The History Behind Our Four Layer Peanut Butter Brownie Bars
Every family has that one recipe that defines their holiday spread and for us, it is definitely these Four Layer Peanut Butter Brownie Bars. It started years ago as a simple experiment to see if we could recreate a childhood favorite from the local bakery. What we ended up with was something far superior because we leaned into high quality cocoa and real butter. Bake Mode becomes an almost meditative state when I am layering these bars because the visual contrast between the dark base and the light filling is so satisfying to witness on the marble countertop.
Essential Tips for Four Layer Peanut Butter Brownie Bars
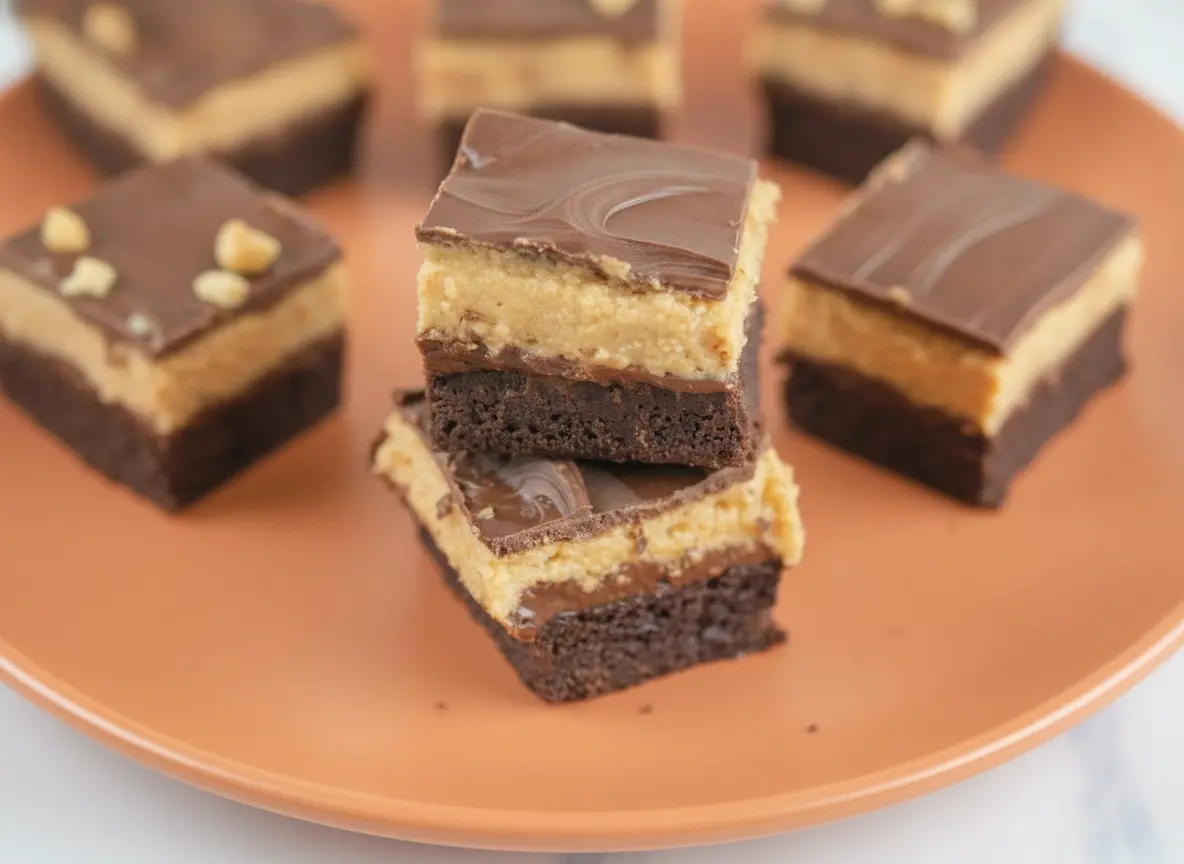
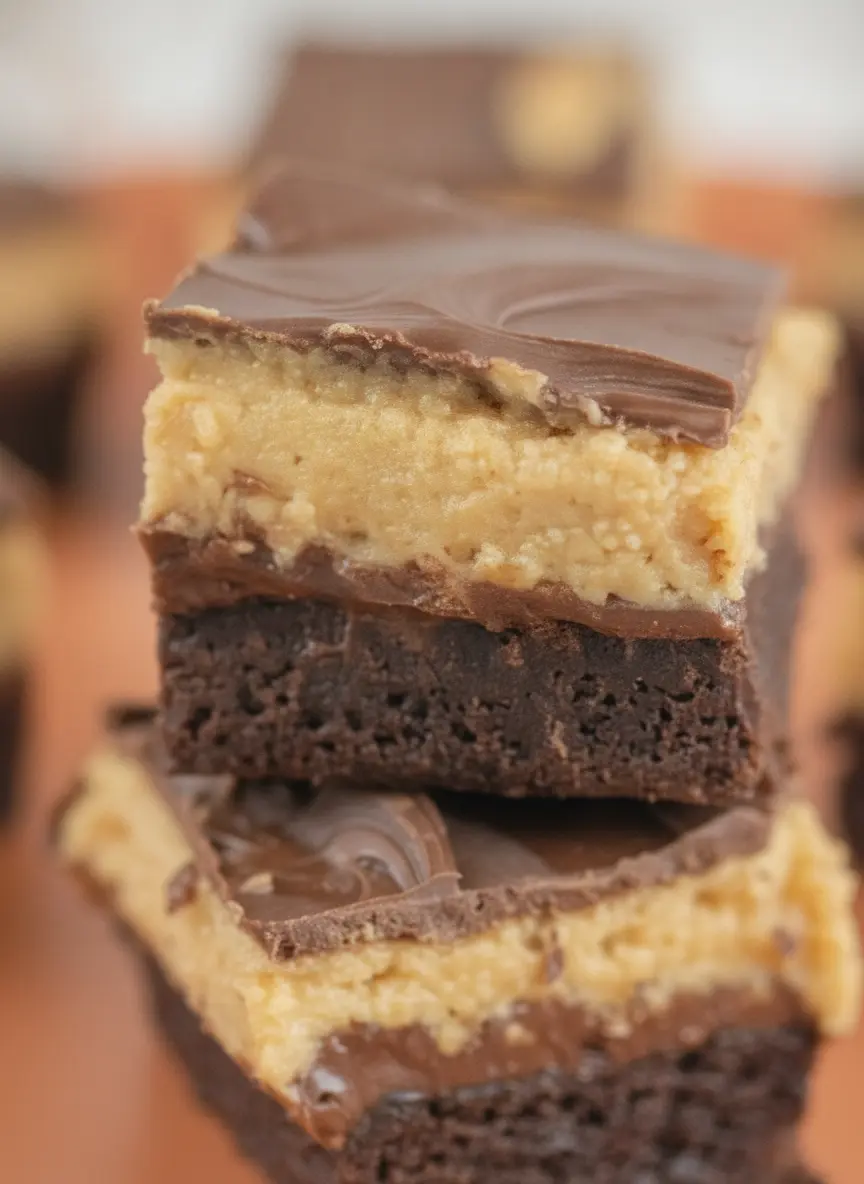
Getting the perfect cut on your Four Layer Peanut Butter Brownie Bars is the biggest challenge most home cooks face. The secret we discovered through many messy trials is to ensure the bars are completely chilled before you even think about touching them with a knife. We often let them sit in the fridge overnight which allows the fudge and the peanut butter to bond together perfectly. Using a warm, dry knife between every single cut ensures that those beautiful distinct layers remain sharp and visible for your guests to admire.
Layering Secrets of Four Layer Peanut Butter Brownie Bars
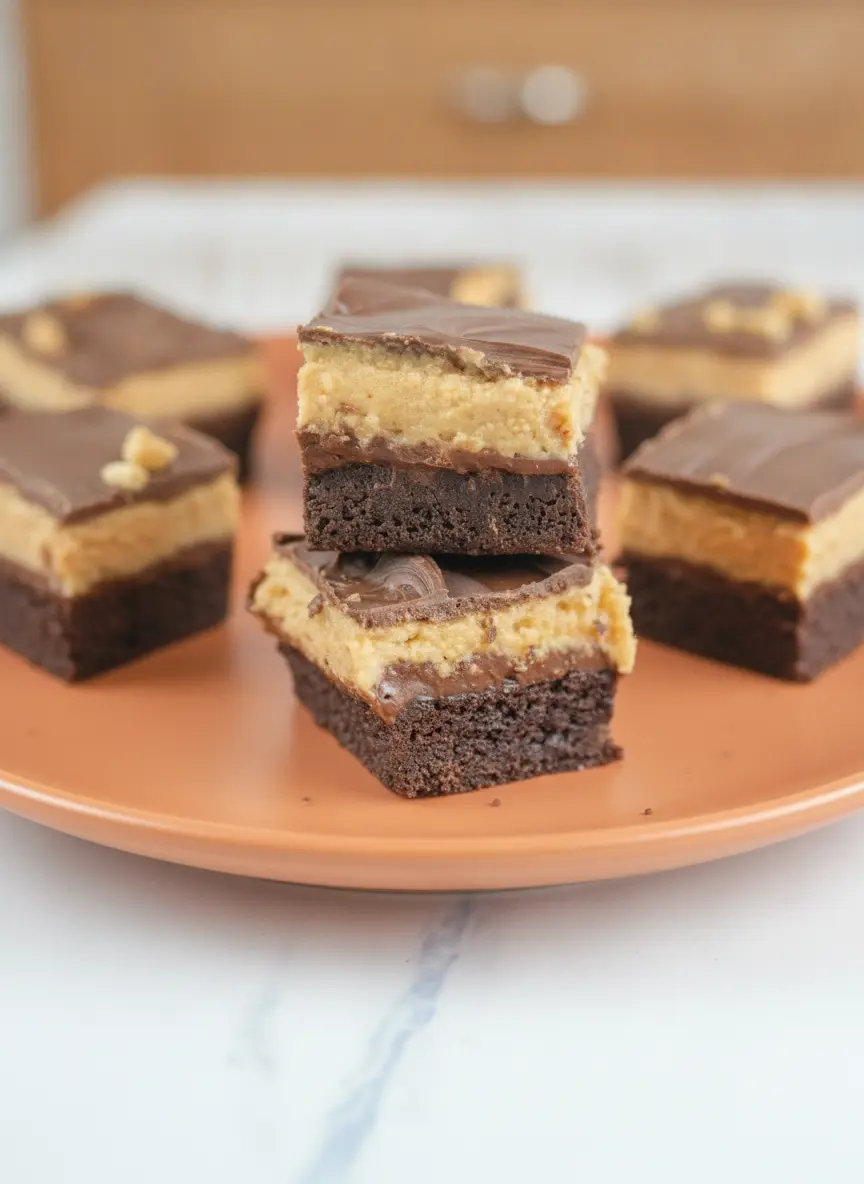
The architecture of Four Layer Peanut Butter Brownie Bars is what makes them so special. You start with a dense, fudgy brownie that acts as the foundation for everything else. Next comes a thin veil of melted chocolate which prevents the peanut butter from soaking into the base. The third layer is a thick, velvety peanut butter mixture that provides that signature salty-sweet kick. Finally, we top it all off with a smooth chocolate ganache that seals the deal. Seeing these four distinct levels stacked high on a white ceramic plate is a victory every single time.
Why Everyone Loves Four Layer Peanut Butter Brownie Bars
There is a reason why Four Layer Peanut Butter Brownie Bars are the first thing to disappear at every gathering we host. The texture profile is unmatched; you get the chew of the brownie, the snap of the chocolate, and the melt-in-your-mouth creaminess of the peanut butter all in one bite. Our friends often joke that they can tell when Bake Mode has been activated in our kitchen just by the lingering aroma of toasted nuts and dark cocoa that drifts through the house. It is a recipe that genuinely brings people together around the kitchen island.
Making Memories with Four Layer Peanut Butter Brownie Bars
When you set out to bake these Four Layer Peanut Butter Brownie Bars you are not just following instructions, you are creating a moment of connection. Whether it is the soft morning light reflecting off the ingredients or the quiet focus of spreading the final layer, the process is just as important as the result. We hope these bars find a permanent home in your recipe box just as they have in ours. There is nothing quite like the feeling of pride when you present a tray of these decadent squares to your family. Now, let’s bring this memory to your kitchen…
Ultimate Four Layer Peanut Butter Brownie Bars Recipe
Course: DessertsCuisine: AmericanDifficulty: Medium4
servings30
minutes40
minutes300
kcalA decadent four-layer treat featuring a fudgy brownie base, a chocolate seal, creamy peanut butter fudge, and a smooth chocolate ganache topping.
Ingredients
1 box fudgy brownie mix plus ingredients listed on box
1/2 cup unsalted butter softened
2 cups confectioners sugar
1 cup creamy peanut butter
2 tablespoons heavy cream
2 cups semi-sweet chocolate chips
1/4 cup creamy peanut butter for topping
1 teaspoon vanilla extract
Directions
- Prepare and bake the brownie mix in a 9×13 inch pan according to package directions. Allow the brownies to cool completely in the pan on a wire rack.
- In a medium bowl, cream together the softened butter, confectioners sugar, 1 cup of peanut butter, heavy cream, and vanilla extract until smooth and fluffy. Spread this mixture evenly over the cooled brownies.
- In a microwave-safe bowl, combine the chocolate chips and the remaining 1/4 cup of peanut butter. Microwave in 30-second intervals, stirring in between, until the mixture is completely melted and glossy.
- Pour the melted chocolate mixture over the peanut butter layer and use an offset spatula to spread it to the edges of the pan.
- Refrigerate the bars for at least 4 hours or overnight before slicing into squares using a sharp, warm knife.
Notes
- Line your pan with parchment paper for easy removal and cleaner slicing.
- For a deeper flavor, add a pinch of flaky sea salt on top of the final chocolate layer before it sets.
- Ensure the brownie base is 100 percent cool before adding the peanut butter layer to prevent melting.