Marbled Rye Bread: Swirled Perfection
Marbled Rye Bread
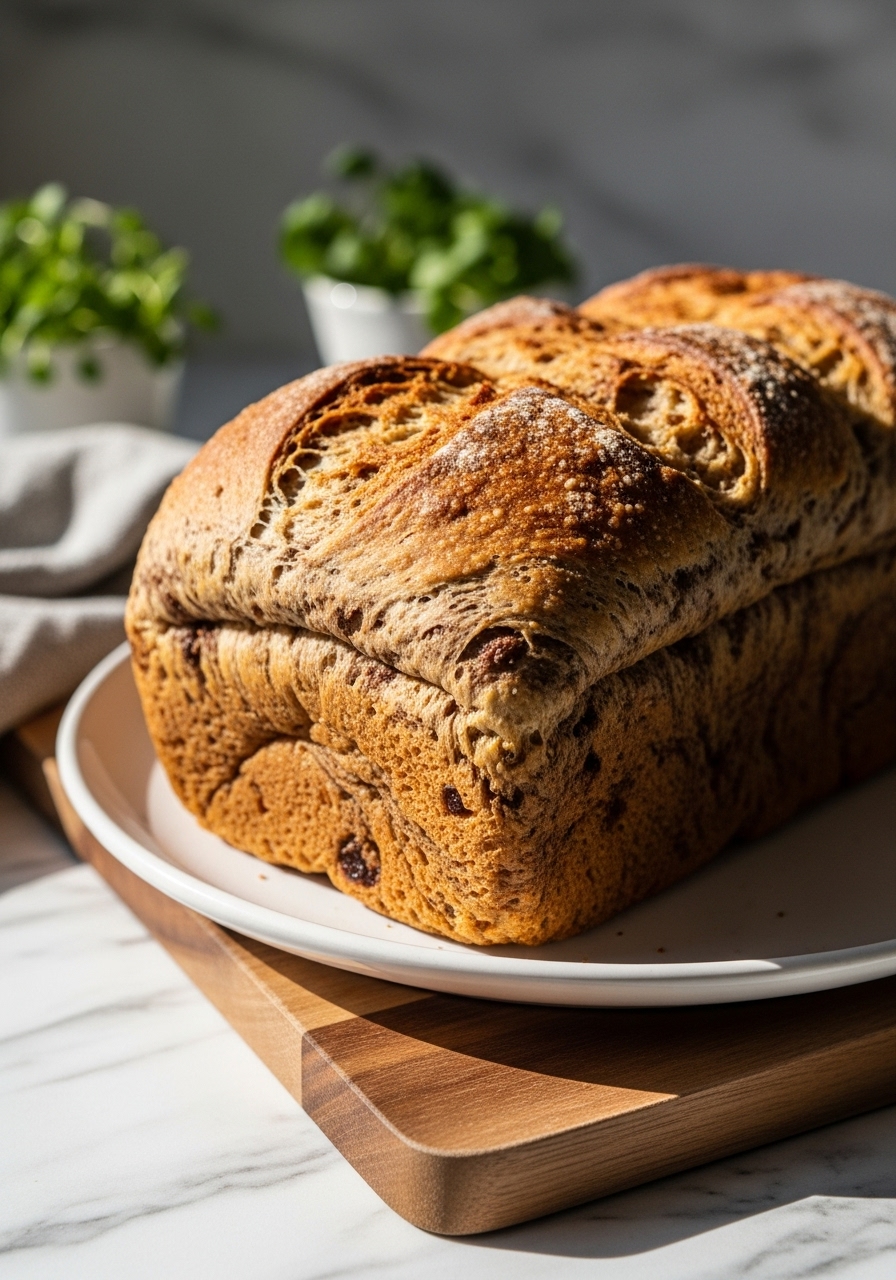
There’s something truly enchanting about baking Marbled Rye Bread—it’s always felt like a little kitchen magic to me! Imagine pulling a beautifully swirled loaf from your oven, the deep, rich browns and lighter, earthy hues dancing together in an almost hypnotic pattern. It’s not just bread; it’s a testament to the art of baking, transforming simple ingredients into a stunning masterpiece that looks every bit as incredible as it tastes. For those curious about the origins or looking for more inspiration on this classic, resources like this guide on Marbled Rye Bread can be fascinating!
Thank you for reading this post, don't forget to subscribe!The journey of creating this bread, from the initial kneading of those distinct doughs to carefully shaping them into that final, breathtaking swirl, is one of my absolute favorite kitchen adventures. It brings such a warmth to my heart, reminiscent of the joy I feel when perfecting other comforting bakes, like a batch of my easy Pumpkin Chocolate Chip Bread. There’s a profound satisfaction in mastering the technique and seeing those intricate patterns emerge, making each loaf truly unique.
Get ready to embark on your own delightful baking journey. This recipe is more than just instructions; it’s an invitation to create a delicious story in every single slice, filled with flavor, texture, and a touch of that irresistible kitchen magic. Let’s bake!
Marbled Rye Bread: Swirled Perfection
Course: BreadsCuisine: EuropeanDifficulty: Medium4
servings30
minutes40
minutes300
kcalCraft a stunning homemade Marbled Rye Bread with distinct dark and light swirls. This hearty loaf, seasoned with caraway, is perfect for sandwiches or simply toasted with butter.
Ingredients
For the Light Rye Dough:
2 1/4 teaspoons active dry yeast (1 packet)
1 cup warm water (105-115°F)
1 tablespoon granulated sugar
1/2 cup warm milk (105-115°F)
2 tablespoons unsalted butter, melted
1 1/2 teaspoons salt
2 cups all-purpose flour
1 1/2 cups rye flour (light or medium)
For the Dark Rye Dough:
1 tablespoon instant coffee powder
2 tablespoons unsweetened cocoa powder
1/4 cup dark molasses
1 tablespoon caraway seeds
Additional:
Vegetable oil, for greasing
Cornmeal, for dusting (optional)
Directions
- Prepare the Light Rye Dough: In a large bowl, dissolve yeast and sugar in warm water. Let stand for 5-10 minutes until foamy.
- Stir in warm milk, melted butter, and salt. Gradually add all-purpose flour and rye flour, mixing until a shaggy dough forms.
- Turn dough onto a lightly floured surface and knead for 8-10 minutes until smooth and elastic. Place in a lightly oiled bowl, cover, and let rise in a warm place for 1-1.5 hours, or until doubled.
- Prepare the Dark Rye Dough: While the light dough rises, in a separate medium bowl, dissolve instant coffee and cocoa powder in 1/4 cup of warm water. Stir in molasses and caraway seeds.
- Once light dough has doubled, divide it in half. Return one half to the oiled bowl, cover, and set aside.
- Add the coffee-cocoa-molasses mixture to the other half of the light dough. Knead this mixture into the dough until fully incorporated and a uniform dark color. This will be the Dark Rye Dough.
- Place the Dark Rye Dough in a separate lightly oiled bowl, cover, and let rise in a warm place for 1-1.5 hours, or until doubled.
- Form the Loaf: Once both doughs have doubled, gently punch them down. On a lightly floured surface, roll each dough into a 9×12 inch rectangle.
- Place the dark rye rectangle directly on top of the light rye rectangle. Gently roll over the layered dough to press them together slightly.
- Starting from a long edge, tightly roll the layered dough into a log. Pinch the seam closed.
- Prepare a 9×5 inch loaf pan by greasing it lightly and dusting with cornmeal if desired. Place the log seam-side down in the prepared pan.
- Second Rise: Cover the loaf pan loosely with plastic wrap or a clean kitchen towel and let it rise in a warm place for another 45-60 minutes, or until nearly doubled.
- Preheat Oven: Preheat your oven to 375°F (190°C) with a rack in the center.
- Bake: Bake for 35-45 minutes, or until the crust is golden brown and the internal temperature reaches 200-210°F (93-99°C).
- Cool: Remove bread from the pan immediately and place on a wire rack to cool completely before slicing. This helps prevent a gummy texture.
Notes
- The Swirl Secret: For the most distinct marble, ensure both doughs are kneaded well and are fairly uniform before layering. When you roll them together, don’t over-press; a gentle roll is enough to adhere them. The goal isn’t to blend, but to combine for that beautiful contrast.
- Rye Flour Variations: Light rye flour will give you a milder, softer crumb, while medium or even dark rye will result in a more robust, denser loaf with a stronger rye flavor. Experiment to find your favorite, but for a classic marbled look, light rye in the ‘light’ dough provides great contrast.
- Patience is Key: Bread baking is a practice in patience. Don’t rush the rising times. A properly risen dough is crucial for a light, airy crumb. If your kitchen is cool, a slightly warm oven (turned off!) with the door ajar can be a perfect proofing spot.